
Small Embroidered Gift Logos: Approve the Detail Changes First
Separate the original logo from proposed embroidery edits, then use a detail exception sheet and an actual-fabric stitch-out to decide what the brand can approve.
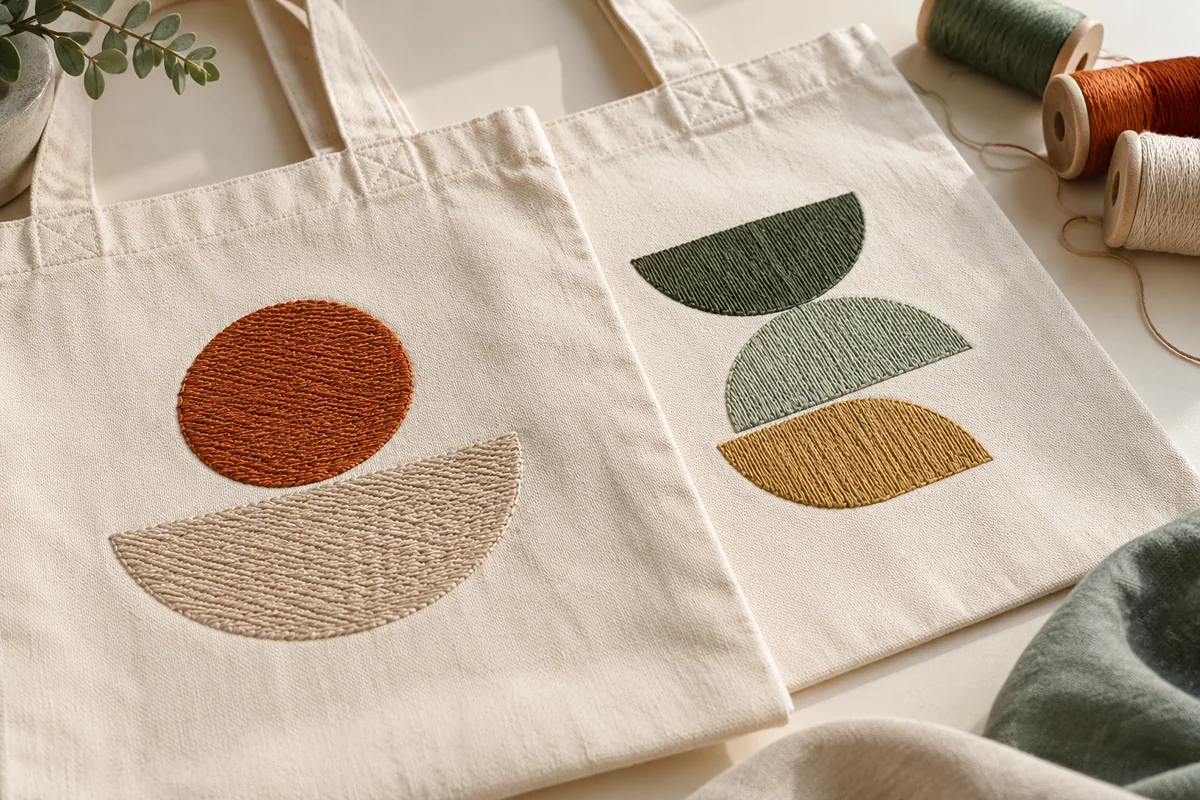
The difficult question in a small embroidered gift logo is often which details the buyer is willing to change. A fine outline, narrow internal gap or short tagline may be important to the brand even when it looks minor to the decorator. Ask for the proposed changes before the artwork is adapted, and assign someone with authority to approve them.
A useful embroidery RFQ has three linked references: the original approved mark, a proposed decoration version with every change identified, and the stitch-out made to assess that version on the intended fabric. Keeping those references separate lets the buyer say precisely what is acceptable without giving open-ended permission to redraw the logo.
Give the decorator the fabric and the final size
Identify the gift and the area being embroidered. Include the product model, fabric description, construction and any lining or reverse-side restrictions that matter in use. A tote panel, cap and shirt should not inherit one another’s approval merely because they carry the same logo.
State the requested artwork width and height in millimetres, its intended location and the surrounding available area. Provide a whole-mark preview plus enlarged crops of the details that must survive. The enlarged views help people discuss a tiny shape; approval still needs to consider the mark at its actual finished size.
Ask the decorator to propose the digitising scope, thread choices, backing and how the reverse will be finished. These are questions for the actual product, rather than a buyer-prescribed machine recipe. Wilcom’s embroidery-lettering guidance explains that lettering settings depend on fabric and include factors such as density and underlay. It does not establish a minimum readable letter size for your gift or confirm a supplier’s equipment.
For file preparation, Adobe explains the difference between pixel-based raster images and scalable vector geometry. A clean source file helps communicate the shapes. It cannot establish how those shapes will stitch at the chosen size.
Mark the details that the brand will defend
Number the relevant features on a review copy. Identify the tiny lettering, the gap between two shapes, a fine border, an enclosed letter counter or a small isolated element. For each feature, explain its importance. Perhaps the tagline is mandatory; perhaps an approved symbol-only version already exists; perhaps a decorative outline can change with written permission.
Do not send “simplify as needed” unless that is genuinely the authority you intend to give. A more controlled request asks the decorator to mark each proposed alteration and provide a reason tied to the selected fabric, size and process. Let the brand owner decide whether enlargement, simplification, omission or another approved mark is acceptable.
Keep ordinary production preparation and changes to the identity distinguishable. The supplier may need to prepare the design for embroidery, but permission to digitise does not automatically settle permission to alter wording, proportions or recognisable shapes. A before-and-after overlay or labelled comparison is useful here.
Use a detail exception sheet
Complete the first two columns before requesting the technical response. The remaining columns should connect the proposed edit to its evidence and decision. This is an embroidery-specific working sheet, not a general supplier scorecard.
| Feature reference | Brand requirement at finished size | Proposed embroidery edit | Stitch-out evidence to request | Decision to record |
|---|---|---|---|---|
| D1: internal opening | Opening remains visibly separate; owner defines importance | Enlarge opening, enlarge whole mark or retain original for trial | Actual-size view and close view of D1 on identified fabric | Approved edit ID, rejected option or unresolved |
| D2: tagline | Exact wording and required presence | Larger lettering, approved alternate arrangement or omission request | Entire tagline shown in context, with revision | Named brand approver and permitted version |
| D3: thin border | Border’s shape and relationship to centre motif | Revised border proposal, with change marked | Edge and adjacent gap visible on trial | Approved appearance limited to this configuration |
| D4: reverse side | Buyer states contact or lining concern | Proposed backing and reverse finish | Front and reverse of identified trial | Product-use concern resolved or further evidence needed |
Attach the marked original and proposed artwork to the sheet. When the supplier reports “fixed,” ask which detail changed and where the revised evidence is recorded. An unlabelled replacement photograph makes it hard to know whether the visible improvement came from a new file, a larger logo or a different fabric.
Hypothetical trial: enlarging the logo versus changing one detail
Suppose a fictional tote logo is requested at 48 mm wide. In an invented trial stitch-out, the inner opening of one symbol is no longer visibly separate. The original artwork shows a 0.6 mm opening at that size. Those numbers describe this example only; they are not embroidery limits.
The supplier proposes two alternatives. Option A enlarges the entire mark to 56 mm. The scale factor is 56 ÷ 48 = 1.1667, so the drawn opening becomes approximately 0.7 mm. That arithmetic describes the drawing, not the stitched result. The buyer must check the available space, changed visual prominence and a new stitch-out before choosing it.
Option B keeps the 48 mm overall width and changes only the inner shape to create a visibly larger opening in the artwork. That preserves the overall size but alters the mark itself. The brand owner may accept the proposed redraw, require an existing approved small-format mark or reject the change.
Neither option is automatically the correct one. Request a separate revision and evidence for each option the buyer wants to assess. If the tagline also needs alteration, list that as its own decision rather than hiding it inside the gap correction. Ask the quote to show the digitising, revision and sampling scope associated with the selected path, without assuming a particular stitch count or fee.
Review the trial as a product decision
Ask for a stitch-out on the intended fabric and construction, or a clearly explained representative sample with its limitations recorded. Identify the sample, artwork revision, finished logo dimensions, thread reference and agreed reverse finish. A simulation may help locate a detail, but it is not evidence that the physical opening remained visible on the actual gift.
Look at the whole motif and then the numbered exceptions. Does the approved wording remain readable for the buyer’s intended use? Is the revised shape acceptable to the owner? Does the reverse finish meet the product requirement? Record observations against those questions rather than giving an unexplained “looks good.”
A sample appearance review covers the submitted configuration and the observations actually made. If wash performance, wear, fabric damage or another performance property matters, request an appropriate separately agreed assessment. Do not convert a clear-looking logo into an unsupported durability claim. The custom gift printing guide places embroidery within the broader decoration and sample process.
Keep the approved embroidery version visible through the order
Once the buyer chooses a version, close each detail row with the decision owner, dated decision and corresponding stitch-out reference. Preserve rejected versions as history while clearly identifying the version released for the agreed next step. If the fabric, logo dimensions, thread or backing proposal changes, ask which approvals need reopening before proceeding.
Agree a service record showing the stage, evidence, owner, unresolved exception and next decision. For embroidery, the useful milestone is often “brand owner approved D1 change against trial E2,” rather than simply “artwork done.” Carry the chosen reference into production and the agreed inspection, packing and handover scope. Full-chain progress tracking means agreed records and communication arrangements; its medium and update frequency need to be confirmed.
Use the gift quote form for the product reference, quantity, destination, requested in-hands date and a PNG, JPEG, WebP or GIF logo preview. Explain the details needing review in the description or decoration notes. Original design files and any complete exception sheet are handed over separately after review. Request a feasibility response with open details, sampling scope and revision consequences before approving the embroidery work.
Frequently asked questions
Can an old embroidery file be reused for a new gift fabric?
Ask the decorator to review it against the new fabric, construction and finished logo size. Keep the original file and prior sample identifiable, then record any proposed change and its trial evidence. Earlier success on one garment is useful history, but it does not by itself approve the file on a different product.
What if the supplier recommends replacing the brand typeface?
Request a side-by-side proposed version showing the exact wording, altered letter shapes and finished size. Route it to the person authorised to approve brand assets. If substitution is prohibited, ask whether an existing approved alternative mark can be used. The supplier should not quietly replace the typeface under a general digitising instruction.
Who should retain the final embroidery file?
Ask the quote to identify what files or records the digitising charge delivers, who retains them and what is available for a repeat order. Do not assume payment transfers ownership or that every machine-ready file remains editable. At minimum, keep the approved artwork, final dimensions, file reference and physical sample identity connected.
Can a patch solve a logo that is difficult to embroider directly?
It can be proposed as a separate product and decoration option, if available, but it changes the brief. Ask about patch material, attachment, edge treatment, dimensions, reverse appearance and use implications. Obtain the brand and product approvals appropriate to that option rather than treating a patch as an invisible production substitution.
Sources
- Custom gift printing: methods, setup fees and sample approval1688 Gifts
- Custom promotional gifts from China: approval, cost and progress tracking1688 Gifts
- Get a quote: mounted ProcurementForm1688 Gifts
- Raster vs. vector: What are the differences?Adobe
- Creating production-ready embroidery letteringWilcom
Discuss a sourcing request related to this article.Small Embroidered Gift Logos: Approve the Detail Changes First